Airbnb photos that get bookings: cover, order, and light
Airbnb photos do most of the selling before a guest reads a word of your listing. Three things matter most: the cover photo, which decides whether guests open your listing from search; the order of your first five photos, which Airbnb shows prominently on your listing; and the light, which makes the whole set look like one real, well-kept place.
I wrote this guide for owners of apartments, villas, B&Bs, and agriturismi (farm stays) in Italy. Most of it applies just as well to any vacation rental (a holiday let or holiday rental, if you’re British) listed on Vrbo, Booking.com, or Plum Guide.
Why Airbnb photos decide bookings before price does
Guests on Airbnb don’t read. They scroll, and photos are the one part of a listing that every guest understands, in any language. On a phone, your cover is a small picture among dozens, and the guest decides in a second: tap, or keep scrolling. From there, the photos carry every step:
- The cover photo earns the click.
- The first five photos decide whether the guest keeps looking.
- The full photo tour lets them picture themselves there, and that’s when people book.
If the photos don’t make guests want to stay, the only thing left to compare is the price, and you start losing margin. This is also why weak photos lower the price guests are willing to pay.
Photos affect where you appear, too. Airbnb’s help center says that high-quality photos and videos attract attention and engagement, which can improve your ranking. More popular listings also tend to rank higher, and Airbnb measures popularity by how often guests save a listing, message the host, and book. A cover that makes people stop helps with all three.
Your cover photo: the one that wins the click
Airbnb’s advice to hosts is to make the first photo your best, because it’s the large one that shows up in search. Too often the cover is simply the first photo the host took. Choose your strongest shot instead:
- the brightest room in the house, usually the living room;
- or what makes your place different: the view over the hills, the pool, the terrace, or the fireplace;
- never the hallway, the front door, or a close-up that means nothing on its own.
For a farmhouse or a villa in the Tuscan countryside, the best cover is often outside: the house, the pool, and the hills behind it in soft evening light. For a city apartment in Florence or Lucca, it’s usually the living room or the view over the rooftops.
Airbnb’s photo guide notes that photos are cropped into squares in search results, so keep the main subject near the center. Then check your cover as a guest would: search your own town and dates in the Airbnb app. At that size, can you tell what the photo shows? If you have to squint, pick another cover.
The right order: a photo tour that walks guests through the house
Airbnb shows your first five photos prominently on the listing page and organizes all of them by room in a photo tour. Its AI sorts new photos into rooms, but you can change the order, and every room needs at least one photo to appear in the tour.
Don’t leave the order to chance. The photos should feel like a visit, as if the guest were walking through the door:
- Cover: your most inviting shot (the view, the bright living room, or the terrace).
- Living room: where guests picture themselves at the end of the day.
- Kitchen: clean and tidy, with one lived-in detail (a moka pot on the stove, or a bowl of lemons).
- Bedrooms: beds made, soft light, and a book on the nightstand.
- Bathroom: folded towels and no personal products in sight.
- Outside: the terrace, the garden, the pool, and the view from the window.
- Details: breakfast on the table, a cup of coffee, and the morning light coming in.
If the pool or the view is the reason people book, move it into the first five. And don’t skip the details. Most hosts do, yet they’re what sells: every listing has a bedroom, but breakfast on the terrace in the morning light is what makes a guest want to be there.
How many photos?
Airbnb asks for at least five photos when you create a listing. Beyond that, there’s no magic number: show every room at least once, the outside, and a few details, in a mix of wide, mid-range, and close-up shots, as Airbnb suggests. Ten photos of the same living room don’t help. A clear order does.
Are your Airbnb photos working for you?
How to take good Airbnb photos: light, angles, and staging
These are the mistakes I see in almost every listing, and how to fix them.
Light. Harsh midday sun flattens a room and burns out the windows. The best light for interiors is soft: morning, late afternoon, or a slightly overcast day, which fills the room without hard shadows. Open the curtains, turn off the flash, and add lamps only if the room is still too dark.
Straight lines. A phone held at a random angle tilts the walls and cuts rooms in half. Shoot from a corner, with the camera level and the vertical lines straight: the room looks larger and calmer. The grid in your phone’s camera helps. Shoot horizontal photos, as Airbnb recommends. Sizes and formats for each platform are in my guide to photo sizes for Airbnb, Booking.com, and Google.
Staging. An unmade bed, the remote on the table, a charger cable in sight: a room can look empty and messy at the same time. Three minutes of tidying before each shot changes the result completely.
Honest size. Don’t use the ultra-wide lens to make a small room look big. After each stay, Airbnb asks guests to rate accuracy: whether the place was represented with up-to-date photos and information. A room that looked bigger online costs you in that rating, and in the review that comes with it.
A consistent gallery: same light, same colors
The problem almost nobody sees in their own listing is inconsistency: the bedroom shot early in the morning in cold light, the garden at noon in hard sun, some photos from a new phone and some from three years ago. Each may be fine on its own. In a row, they look improvised, even when the place is spotless. Nobody writes to tell you that your photos clash. They just book the listing next to yours.
A consistent gallery keeps the same color temperature, saturation, and brightness from first photo to last, as if one person shot it all. That doesn’t mean one filter on everything: a warm preset that flatters a bedroom at sunset ruins a breakfast room at noon. It takes calibration:
- Pick two or three main tones that match the real place: the wood floors, the stone walls, the fabrics. The palette is usually already there.
- Shoot in similar light. Mid-morning and late-afternoon light is the softest and the easiest to repeat. Don’t mix full-sun noon shots with dim ones.
- Don’t mix light sources. A warm bulb next to a window full of cool daylight puts two color casts in one photo. Switch the lamps off, or make sure they all match.
- Edit the whole set together. Correct white balance, exposure, and saturation the same way on every photo. You’re not making them prettier. You’re making them match.
- Skip the phone filters. Quick edits made one photo at a time, by feel, pull each image in a different direction.
An example from Lucca
I photographed a vacation rental in Lucca that was still using photos taken more than ten years earlier: dark, crooked, and each with a different color cast. Together they said the opposite of what the place offers in person. I shot a new set, bright and professional, and edited every photo, from the wide shots to the details, so they all share the same light and the same palette.
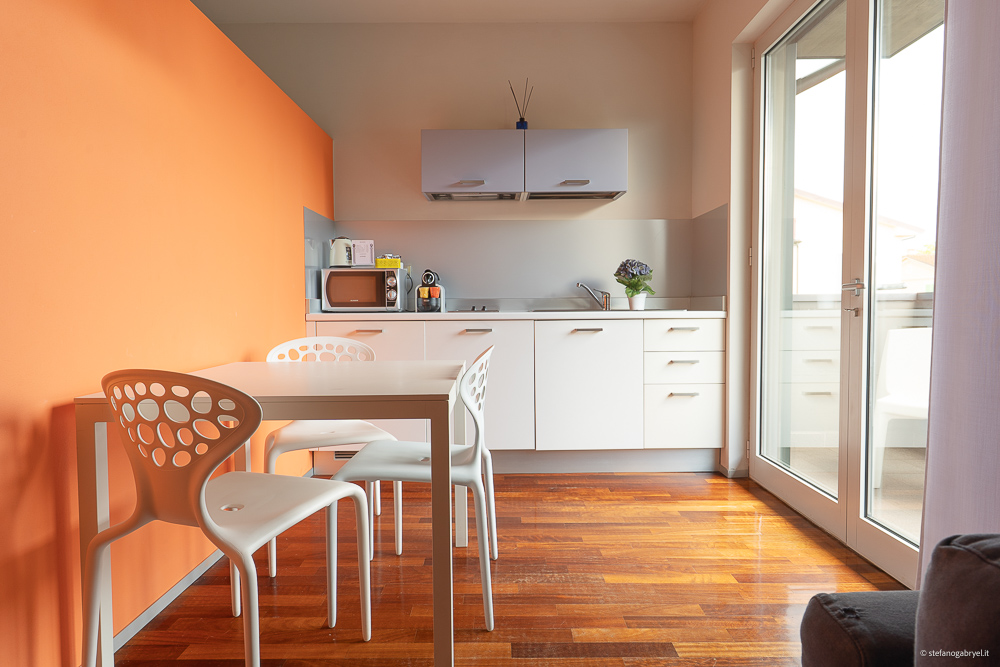
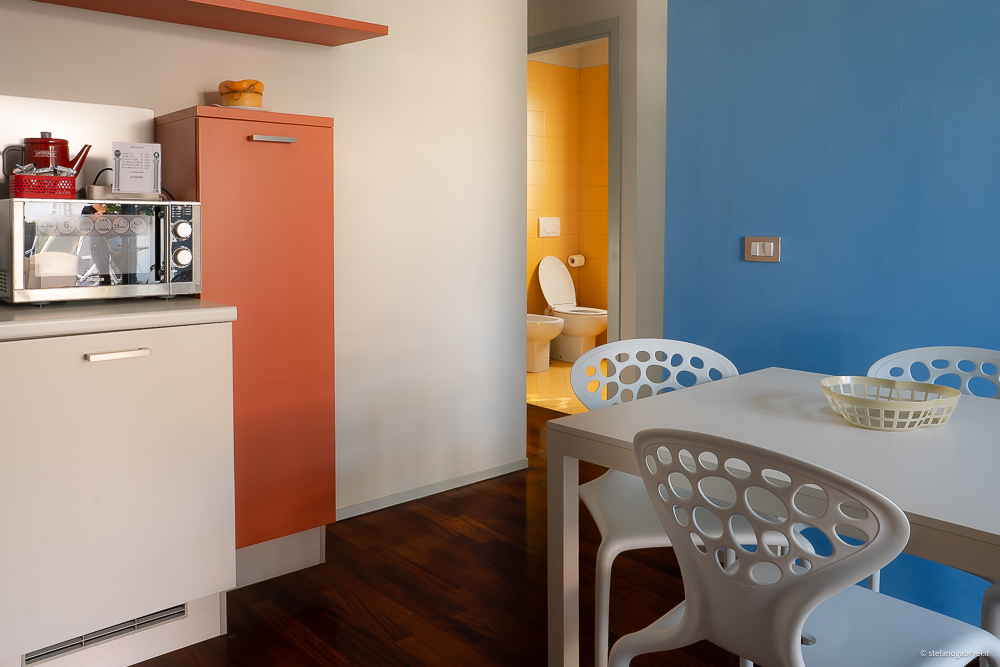
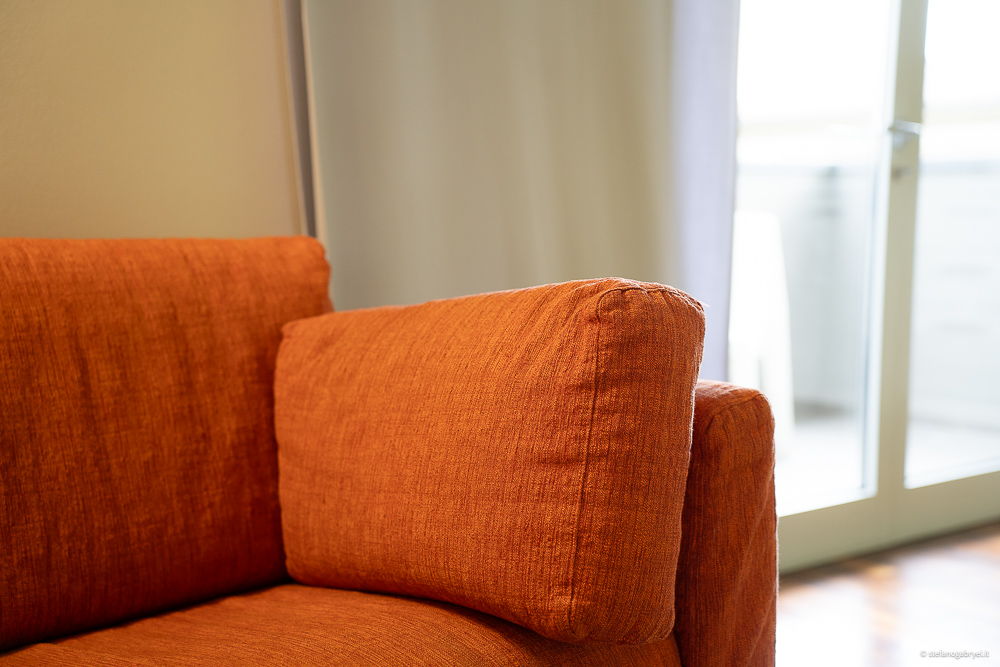
These photos give the home an identity: you can tell it’s this place and no other. They show the atmosphere as well as the space, and that is what makes guests want to be there.
Airbnb, Booking.com, and Vrbo: same photos, different order
Don’t upload the same gallery in the same order everywhere. On Airbnb you mostly sell atmosphere: how the home feels, the personal details, and the story. On Booking.com guests compare more coldly, so you sell certainty first: the room, the bathroom, then the extras. I explain that order in Booking.com photos that get bookings. Vrbo only lists homes that guests don’t share with the host or with other guests, so its logic is closer to Airbnb’s: show how the whole house lives.
Hiring a photographer: what to prepare
A small apartment can look good with a recent phone and the steps above. A photographer pays off when the house is large or has a pool, when your nightly rate is high, when your photos are older than your last renovation, or when the view only works at one hour of the day. What a shoot costs in Italy, and what the quote should include, is in my photography pricing guide.
If you book a shoot for your vacation home in Tuscany, prepare it as you would for your best guests:
- Get every room guest-ready the day before: beds made, towels folded, personal things put away, and burned-out bulbs replaced.
- List what guests book you for: the pool, the view, the pergola, the fireplace, or the walk to the village. Those are the shots that can’t be missed.
- Agree on the timing. East-facing rooms look best in the morning, a west-facing terrace at sunset. Outdoor shots should show the house in the season you sell most.
- Say where the photos will go: Airbnb, Booking.com, Vrbo, your own website, and social media. You’ll get the right formats, and you can make sure you’re allowed to use the photos on all of them.
If you also list on Plum Guide, read its host agreement: Plum Guide may send its own photographer and owns the photos that photographer takes, so you can’t use them elsewhere without its permission.
Photos first, then everything else
Photos work best as part of a system, with the same look and message on Airbnb, on your website, and on social media. That’s why they are step one in the marketing order I suggest for small hotels and rentals: your website, your Google Business Profile, social media, and ads all reuse them. When the photos show what your place is worth, price stops being the only thing you compete on.